Negotiation Tab
From the system’s main menu, access Sales > iQuote > Estimate, select an approved Estimate (e.g., that has the "in proposal" status or further), click Edit, and then go to the Negotiation tab of the Estimate record to view its commercial details.
The Negotiation tab displays the cost and price information related to the Engineering production, depending on the Quantity and Option that is currently selected in the Estimate. For instance, the first table that you see is a summary of the components' data and the information is split in sections:
Substrate Cost
Other Raw Materials Cost
Transformation Cost
Other Costs. This table refers to costs that are not cost-hour (e.g., the freight).
Production Cost
Sale Cost
Sale Price
To be able to access and edit the fields in the Negotiation tab, your iQuote User must have the following access control enabled:
EPS > SALES > IQUOTE > ESTIMATE > ESTIMATE EDITION > NEGOTIATION
EPS > SALES > IQUOTE > ESTIMATE > ESTIMATE EDITION > KEEP MANUAL CHANGES COLUMNS EDITABLE (INPUT, WASTE, SPEED, AND SETUP)
Note: This access control enables you to edit the Input, Setup Waste, Production Waste %, Fixed Setup, and Rep Setup fields from the Negotiation tab, Product tab, and the Engineering tab of the Estimate.
EPS > SALES > IQUOTE > ESTIMATE > ESTIMATE EDITION > KEEP ACTIVITY BUTTONS ENABLED
Note: This access control allows you to add, cancel exclusion, delete, and edit an Activity from the Estimate. If the control is disabled for your iQuote User, you cannot see the Add, Edit Activity, Delete Activity, and Cancel exclusion of the Activity (or Undelete Activity) buttons, which you can find in the Negotiation tab, Product tab, and the Engineering tab of the Estimate.
EPS > SALES > IQUOTE > ESTIMATE > ESTIMATE EDITION > ALLOW VIEWING COST
Note: This control allows you to see and edit the Production Total cost section of the Negotiation tab and the percentage cost image on the Engineering tab. After doing any changes on this access control, you must restart the iQuote server.

Note: You can edit some fields in the Negotiation page itself. However, note that the Negotiation and Qty/Price tabs share and display a lot of information, so if you change something in the Negotiation tab, the system replicates that change in the Qty/Price tab as well.
The system identifies the editable fields with an edit icon when the the user hovers the mouse over it, as highlighted below:

Moreover, the system highlights in red the Cost Items that must be reviewed. To define that an item needs review, Then, check the checkboxes on the Needs Reviewing column for each of the ranges that you want the estimator to review.

Sales Price
You can find the Sales Price table at the bottom of the Negotiation tab. It displays and allows the user to edit the most relevant price composition information on the product:

Note: You can edit the % Margin, $ Margin, % Marginal, $ Marginal contribution, Unit price, Price x thousands and Total price fields as long as the Estimate has not been approved or canceled yet.
To edit any of those fields, you just need to click on the value, change it, and click tab on your keyboard. Once the change is made, the system will automatically update all other values accordingly.
See below what each of those fields mean:
|
Field |
Meaning |
|
Product |
Displays the product name for each item in this Estimate. |
|
Destination |
Specifies the type of shipment for this product. |
|
Qty |
Displays the number of units ordered of this product. |
|
Un |
Displays the unit of measurement used for this product. |
|
% Margin |
Displays the percentage value of the profit margin calculated for this product. Note: The profit margin calculation may vary and you define it in the Estimate General Setup. For more information on the different calculation options available, refer to Margin Calculation and Setup. Note: If you edit this field, the system applies any modification to all products in this Estimate. |
|
$ Margin |
Displays the absolute value of the profit margin calculated for this product. Note: The profit margin calculation may vary and you define it in the Estimate General Setup. For more information on the different calculation options available, refer to Margin Calculation and Setup. Note: If you edit this field, the system applies any modification to all products in this Estimate. |
|
% Value Add |
Displays the percentage value of the value add calculated for this product. That is, the profit plus the fixed production cost. Note: If you edit this field, the system applies any modification to all products in this Estimate. |
|
$ Value Add |
Displays the absolute value of the value add calculated for this product. That is, the profit plus the fixed production cost. Note: If you edit this field, the system applies any modification to all products in this Estimate. |
|
Unit price |
Displays this product's absolute price per unit. |
|
Price x thousands |
Displays this product's absolute price per a thousand units. |
|
Total price |
Displays this product's total price. |
|
% Target margin/Table |
Displays this product's original gross margin percentage, so you can compare it if any modifications are made. |
|
Ideal Price/ Table |
Displays this product's original price, so you can compare it if any modifications are made. |
|
% Discount |
Compares this product's original and current prices, identifying the discount percentage or addition value. |
Note: By clicking the Other functions > Margins, in the top menu, you can edit the margins for each part of the transformation process. Each step can have a different margin, but those values are equally applied for all products in the Estimate.

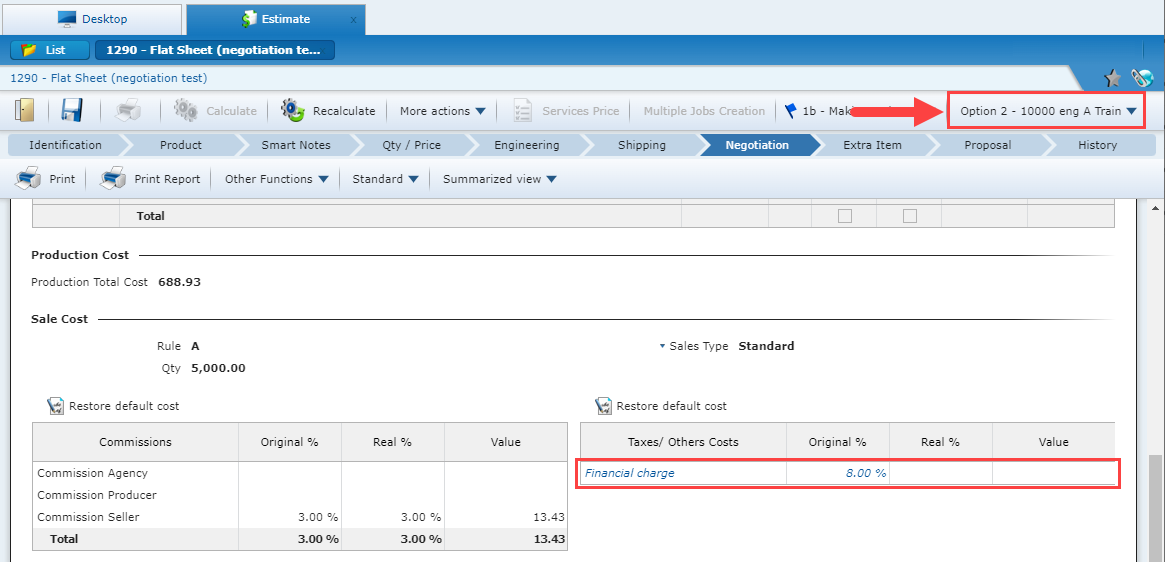
Sale Cost
The Sale Cost section represents the costs related to the shipping's Cost Rule feature and it is where you can detail the commissions' and taxes' values. You can, at any time before approving the Estimate, change these values. However, note that the system may automatically apply this change to the same Commission or Tax that belong to the same Cost Rule in the other quantities and options, according to what you have defined for the Sale Costs in the Negotiation Rules.

See some examples below.
Scenario 1
The Estimate has more than one quantity and/or option and Sale Costs is "Apply to all quantities for all options".
Consider that you define in the Negotiation Rules window that the Sale Costs must be "Apply to all quantities for all options" and that the Estimate has: Option 1 and Option 2, each option has the "10,000" and "20,000" quantities, and each quantity has Cost Rule "A" only. When you change the tax percentage in Rule A of the "Option 1 - 10000", the system automatically copies that same tax to all the other quantities, even those from the other option (e.g., copies to the "Option 1 - 20000").

Scenario 2
The quantities have more than one Cost Rule and the Sale Costs is "Apply to all quantities for all options".
It is important to note that the system validates two parameters when replicating the value that you change: the value's description (e.g., "CONFINS") and the name of the Cost Rule (e.g., "A"). Because of that, the system does not automatically replicate any change that you make in the Rule A to the Rule B.
Thus, consider the same configuration from Scenario 1, but now each quantity has two Cost Rules, "A" and "B". When you change the tax percentage in Rule A of the "Option 1 - 10000", the system automatically copies that same tax only to the other quantities (even those from the other option) that have the same Rule A (e.g., copies to the "Option 2 - 20000"). If the quantity does not have Rule A, the system does not replicate to it.

Scenario 3
The quantities have more than one Cost Rule and the Sale Cost is "Apply only in the selected option".
Consider the same configuration from Scenario 2, but now you define in the Negotiation Rules window that the Sale Costs must be "Apply only in the selected option". When you change the commission percentage in the "Option 2 - 10000", the system does not replicate the change to any of the other options or quantities (e.g., it does not replicate to the "Option 2 - 20000").

Scenario 4: copy an edited option
Copy an Estimate Option that you edited.
Consider that the Estimate has only the "Option 1", one quantity "10,000", and only the "A" Cost Rule. You change Rule A's tax value, and then you create another option by copying the existing one. The system creates a new option using the tax value change that you did.
In this case, it does not matter which option you selected in the Sale Costs field in the Negotiation Rules window. The system always creates a new option with the new tax value.
Scenario 5: copy an edited quantity
Add new quantity when Sale Costs is "Apply in all quantities of the selected option" or “Apply in all quantities for all options”.
Consider that you define in the Negotiation Rules window that the Sale Costs must be "Apply in all quantities of the selected option" or “Apply in all quantities for all options”. The Estimate has only the "Option 1", one quantity "10,000", and only the "A" Cost Rule.
If you change Rule A's tax value, then add a new quantity, the system creates a new quantity with the tax value change that you did.
Add new quantity when Sale Costs is "Apply only in the selected option".
Consider the scenario above, but now the Sale Costs is "Apply only in the selected option".
If you change Rule A's tax value, then add a new quantity, the system does not replicate to the new quantity the tax value change that you did. It uses the original value.
Scenario 6
Copy an Estimate option that you edited and then change the Cost Rule name.
Consider that you defined in the Negotiation Rules window that the Sale Costs must be "Apply to all quantities for all options" and that the Estimate has only the "Option 1", one quantity "10000", and only the "A" Cost Rule. You change Rule A's tax value, and then you create another option by copying the existing one. The system creates the new option and replicates in it the tax value change that you did.
However, if you access the new option's Shipping tab and change the Cost Rule's name from "A" to "B", the system automatically reverts the tax change in the Negotiation tab of the new option to the original value.
Margin Calculation and Setup
The system offers three different calculation methods for calculating the product’s gross margin, which you can select in the Estimate General Settings (Sales > Records > iQuote > Commercial > Estimate General Settings).

Option 1: Gross margin
Price = Production cost/ (1 – % gross margin + % sale costs)/ 100)
In this option, the system calculates the gross margin as a percentage of the final price, including production cost, sales cost and the margin itself.
Option 2: Markup over production cost
Price = Production cost * (1 + % markup / % sale costs)
In this option, the system calculates the gross margin as a percentage of the original production cost only.
Option 3: Gross margin over production cost
Price = Production cost / (1 - % gross margin / % sale costs)
In this option, the system calculates the gross margin as a percentage of part of the final price, including production costs and sales cost, but not the margin itself.
Note: Option 3 is rarely used.
Note: The Production cost value is composed by the fixed cost and the variable cost. The fixed cost for each process is defined in the Production group records, in Advanced settings > Costs tab.
The Transformation Cost Type required in this record is defined in Sales > Records > iQuote > Costing.
You must also define the target gross margin that the system must use in the Estimates. For that:
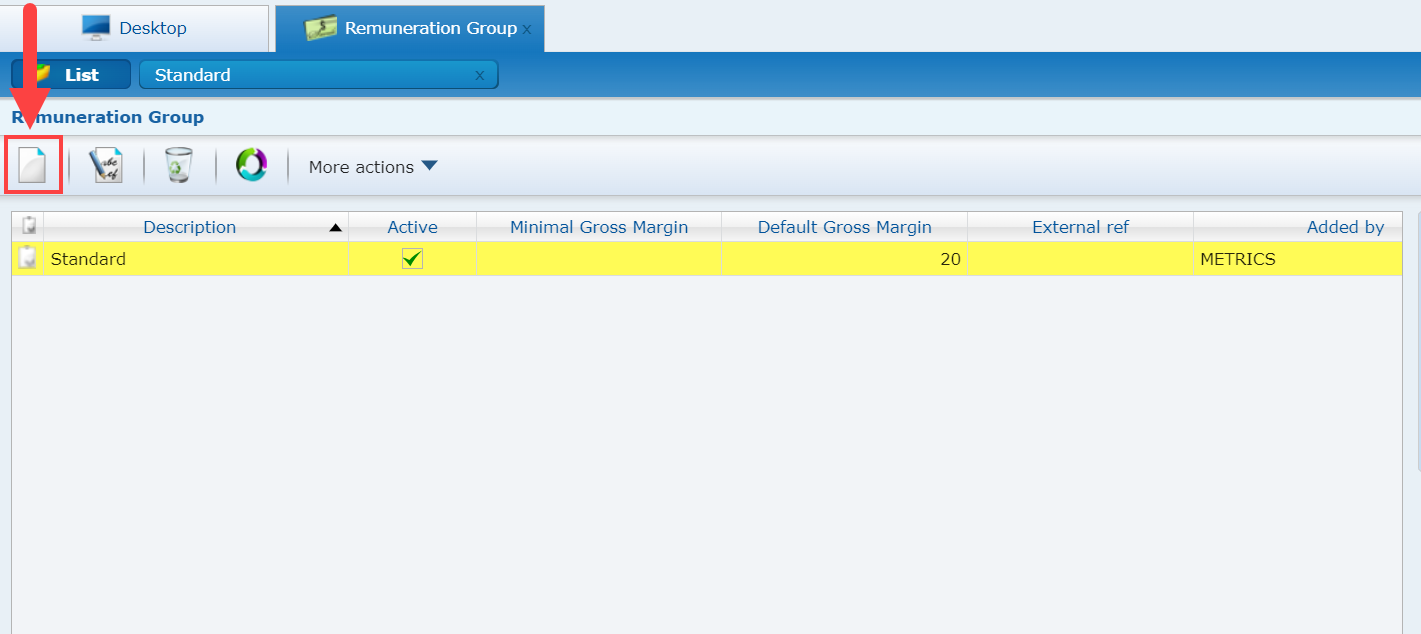
Go to Sales > Records > iQuote > Commercial > Remuneration Group. The Remuneration Group browser opens.
In the browser, you can see the Standard group, which the system already provides.
You can create other groups by clicking the New button, if necessary.
Define the Remuneration Group according to your needs.
(optional) It is possible to configure a different profit (i.e., margin) depending on a range in the quantity of products that you are estimating. For that:
Select the available option in the Factor depending the estimate field on the Remuneration Group page. Once you do that, the system displays a new grid.
click the New button to create a line in the grid.
Define in the Amount Starting On column the starting quantity that you want the markup to be applied on and, after that, its related Factor.
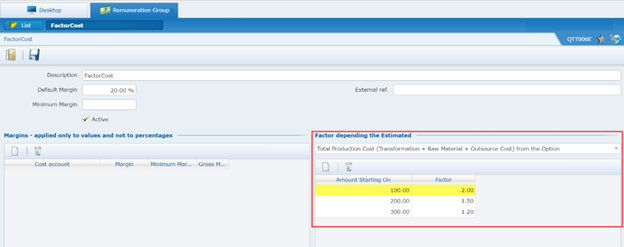
The next time that you estimate a product, the system will multiply the Margin % by the appropriate Factor value (considering the Estimate option's quantity) to calculate the margin value.
Go to Estimate Standards at Sales > Records > iQuote > Commercial > Estimate Standards to define the default Group.
On the General Default tab, select the appropriate record in the Remuneration Group field.

(optional) You can also set alternative Groups in the Exception tab for specific product types, companies or customers.

Note: You can go to Other Functions > Margins to restore all the margins back to the Remuneration Group's defaults.
Views
The system also allows you to choose how you want to visualize the information in the Negotiation tab. To access this feature, on the top menu of the Negotiation tab, select an option:


Detailed View
The system displays the prices and costs per component in the tables so that you can see how they are contributing to the final costs.

Summarized View
The system does not distinguish the costs per component, it groups the information by the cost definition that they are related to (e.g., the materials used).

Summarized View With Chart
This view provides useful charts for you to visually analyze the costs distribution throughout the production process. Roll the page down to see charts similar to the following:
The Cost + Margin chart shows how the cost and margin summed up value is distributed:

The Production cost distribution chart shows the cost for each step of the production, such as printing, finishing, raw material etc. The green area in each column represents the cost itself, while the orange area represents the gross margin.

Standard
The system displays the Negotiation information in a format optimized for printing.

Simplified
This view is similar to how the system displays the cost/price data in the Qty/Price tab.

Analysis
This view displays the data in graphics.

Proposal
- From the Estimate record, click Proposal > Price detail and check if all the values are grouped correctly.

- Click New Proposal to send the Estimate to the customer. The following screen opens:

- Select the options that the system must add into the proposal, fill in the remaining fields as needed, and select the sending method in the Send By field.
- Click Go.
- If the sending method selected was e-mail, the system will send the proposal by e-mail to the selected address (if it was set up beforehand).
- If the sending method was one of the other options, the View Quote window opens. Click the quote letter link to download the file.
Note: You can set the format in which the system downloads/saves the letter file in the Proposal Model record. The available formats are PDF, DOC, and XLS.
