Managing Job Events
The old task feature, present in iQuote before version 8.1, has been through a profound redesign and got renamed as Event.
As much as the previous versions, the events still represent actions to be taken by the system’s operators. It also can be set for any object, such as jobs and estimates. For example, when approving a job, the system can create an event indicating the prepress department has to verify if the customer requires sending a hard proof.
Events can be automatically created based on a status change, checklist marked, being assign to a person, expiration dates, etc. But it’s also possible to manually create some types of events.
In this document we’ll also present the enhancements made to the Job to better use the Event features.
Job events configuration
All the iQuote’s objects have the Event type tab, where users can configure action that will happens in the system when some conditions are met. For example, when a Job is released to production iQuote sends a message to the prepress team for sending proofs for approval.
Note: Although Events types can be set up for all objects in the system, this section describes the creation of events types only in the job object.
The Header event type is valid for all objects in the system, but the other event types are exclusive for the job object.
Follow the steps and instructions below for configuring a job event:
Go to Administration > Workflow > Objects
Open the Job object and go to the Event type tab.
Click New.

Definitions tab
General
Populate the fields in this tab as described below:
|
Field |
Description |
|
Event creation type |
Select the most appropriate among the creation type options: Component Characteristic Component Link Header Letter Text Link Product Version Link Production Groups For a detailed explanation on each type, go to Event management types. |
|
Can be created manually |
Enable this parameter for allowing the event type to be manually created. This option is available only when the selected creation type is header or product version. For a detailed explanation on manually created job events, go to How to manually create events. |
|
State of alert |
Enable this parameter to create a customized condition for throwing an event into state of alert. Check the note and example below. |
|
Automatically cancel the Event when the task is deleted |
When you enable this option, the system cancels the event when you change it to the Alert status. Note: The system displays this option only when the Event Creation Type field is set to “Component Characteristic” or “Production Groups”.
|

Note: There are some conditions that can trigger an alert status in the job event by default. Those conditions may vary according to the event creation type and are detailed in Event creation types.
Besides that, users can also define customized conditions for setting a specific event into alert status.
When State of alert is selected a new filter is added to this window. Use the filter to set up the customized condition for the alert.
|
EXAMPLE |
|
A company usually prints FSC compliant jobs in plants B and C, but never in plant A. So it’s important to verify any jobs with FSC simulated in plant A, to be sure this is the most appropriate route. In this scenario, the user can create an event “Internal approval” and set a customized alert to it. The filter configuration for meeting those conditions would be like this:
This configuration says the event will be set in alert status when the job meets both conditions at the same time: Has the FSC characteristic Is planned to Plant A After confirming the filter creation the user can see the resulting condition described in the event creation window:
|


Event creation types
Header
This event type is based on the job’s general information, therefore has only the basic event data and the standard tabs Notes and History.

Note: Any events created in iQuote versions prior to Suite 8.1 are were automatically set as “header” event type during update.
Product versions
This event type is linked to all final product version in the job.
Once the event has been created, the user can see all products from the job under Product versions and, if necessary, unselect any of them.

Note: The same product cannot be linked to the same event instance twice.
|
EXAMPLE |
|
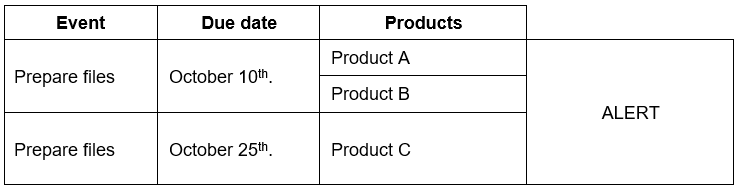
Job 1 has three final products (A, B and C) and two events (Prepare files and Color check).
Although the event “prepare files” occurs in two different dates, it is still only one event instance. Because of that, Product A cannot be linked to this event in both dates. |

Product Version alert state:
iQuote activates the alert status for events of this type when some but not all the products in the job are linked with any occurrences of this event.
|
EXAMPLE |
|
Job 1 has four final products (A, B, C and D) and one event occurring in two different dates. In the first situation we have all products linked to the event:
Although we have some products in one date and others in another date, all products are linked to the event. Therefore, the system will not raise an alert. But if one or more products were not linked to any occurrence of the event, iQuote would put this event in a state of alert:
|

Production groups
This events of this type can be selected in the Production group, under Other > Event record and are created automatically every time the engineering uses the linked Production group.

Note: Events in the Production Group creation type are triggered exclusively by production groups. They cannot be created by the usual triggers available in the event type configuration tab (Administration > Workflow > Objects > Job > Event type tab > New > Trigger events).
For configuring the production group for triggering an event, follow the steps below:
In the Event tab, click New.
Select the Event type. Only event types set as “production group creation type” will be listed here.
In Type of Event Creation select between:
One event for all planning tasks: Only one event is created and all the planned tasks are listed inside of it.

Events for each planning tasks: One separated event is created for each planned task in the production group.

Enter notes to be added to the event when created.
User can choose to set up the event trigger using any of the filters created in the production group or by an information range.
Production Group filters:
Under Filters, click New.

Select one of the filters previously created in the production group.
Select a filter option, among the options recorded in the filter.
Add as many filters as necessary.
In How to validate the conditions select one option:
All conditions must be met
At least one condition must be met
No condition must be met
Filter by information range:
Under Filter by information range, select a variable.

Enter the range’s minimum and maximum values for filtering.
Note:
Production group events can be linked to any Production group.
For each production group it is possible to add multiple events
The event is automatically created when the engineering is calculated, selecting the linked production group.
Each time the engineering route uses the linked production group will prompt the system to create a new event.
Production Group alert state:
iQuote activates the alert status for events of this type when the linked production group in not being used by the engineering anymore.
Notice the event is not deleted automatically. The system only raises the alert, but the user has to cancel or close the event manually.
Due date calculation
Populate the fields in this tab as described below:
|
Field |
|
Description |
|
Auto calculate Initial Due Date |
Number of hours |
When the due date is not manually defined in the event itself, iQuote calculates the due date automatically. Enter the number of hours after which the event’s due date shall be set. |
|
From this date... |
Select the action that will kick start the time counting to the event’s due date. |
|
|
Due date rules |
Round date |
This configuration can be used to round up the calculated due date. Select among the following options: No round up 1h 6h 12h 24h Check the Example #1 below. |
|
Regular start time |
Enter the regular starting and final working hours. This field is displayed only if the selected round date option is “No round up” or “1h”.
Check the Example #2 below. |
|
|
End time |
||
|
Work days week |
Open the drop down menu and check to select the work days of the week. If no days are selected, the system calculates the due date considering all days as working days. If some days are selected and others are not, the system calculates the due date considering only the selected days. Check the Example #2 below. |
|
EXAMPLES |
||||||||||||
|
Considering the following configuration the event’s due date is calculated to be 24 hours after the first delivery date in the job.
If the first delivery happens Monday 13h40, the auto calculated due date would be Tuesday 13h40. Depending on the option selected in the Round up we would have: |
||||||||||||
|
||||||||||||
|
Considering the following configuration the event’s due date is calculated to be 24 hours after the first delivery date in the job.
If the first delivery happens Friday 11h00, iQuote calculates the due date considering the parameters defined under Due date rules: From the starting time (Friday 11h) to the end of the working day (Friday 17h) we have 6 hours. 10 hours – 6 hours = 4 hours left to due date Once the working day is over iQuote stops counting the time until the start of the next working day. In this case, the following day is Saturday and the work days are defined from Monday to Friday only. So, iQuote will resume the counting on Monday 9h. Since there were still 4 hours left, the due date will be Monday 13h. 9h00 + 4 hours = 13h00 |


Classification
|
Field |
Description |
|
Category |
Select the most appropriate among the creation type options: Pre-manufacturing Post-manufacturing |
|
Priority |
Choose the appropriate severity for this event type: Average High Low |
Method for completing event
Select one of the possible methods for completing the event.
Manual
When this option is selected, users are able to manually complete the event both in the Job event browser and in the desktop.

Click Completion Options for configuring how the event can be closed.
Status
Select one of the existing recorded status options. When the job enters the selected status, the event is automatically completed.

Condition
Choose this option for using a filter to define the specific condition to be met so the event is automatically closed.

Trigger events
Use the buttons under Trigger events to configure the system’s actions when an event:
is assigned to someone;
is closed;
is cancelled;
has its due date postponed;
is overdue;
when the due date fails validation.
Note: The system triggers the When Due Date Fails Validation event when you save the Sales Order, updating the Product Version Link events from the related Job.
This option only appears if the Event Creation Type field is "Product Version Link" and the Type of date to validate field is not "do not validate".

Click the appropriate button.
In the following window, click New.

Click Condition to generate action to set the filters for the event.
Enter the appropriate condition and click Ok.

|
EXAMPLE |
|
The user can define the action they are configuring will happen only for Jobs belongs to a specific salesperson. |
The field Secondary Object field allows the user to specify that this action – be it a new event, a checklist or a notification – will be applied to another object, not the job.
If this field is left blank, the configured action will apply to the job object.
|
EXAMPLE |
|
The user can define this event will be generated only when the respective job is “Released w/ production”. |
Complete the fields under Events, Check List and Notifications tabs, depending on the action created, as described below.
Events tab
Use this tab for defining the current event will trigger the creation of another event:
Under Create events select which events will be created. Only events previously recorded in job object are available for selection.
Under Cancel events populate the fields as described:
|
Field |
Description |
|
Event cancelation |
Select a rule for cancelling events, which can be: Don’t cancel Cancel all Cancel all from the list Cancel all EXCEPT from the list |
|
Events |
Select which events these rules will apply to. Only events previously recorded in the job object are available for selection. |
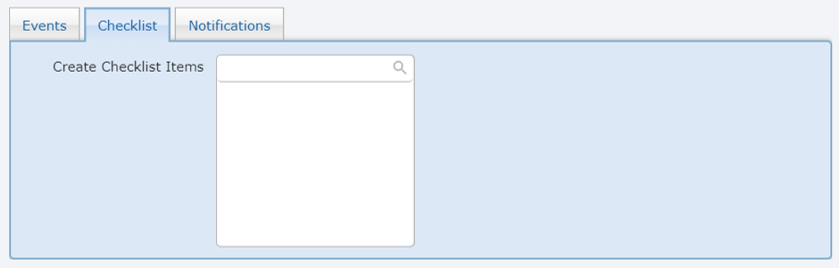
Check list tab
In Create check list items select the items that will be created in the job for this event. Only previously recorded check list items are available for selection.
For more information, refer to "Check list" in the iQuote User Guide Objects.
Notifications tab
In this tab, configure the notifications that will be sent by this event. Only previously recorded notification templates are available for selection.
Click New and complete the fields as described below:

|
Field |
Description |
|
Notification template |
Select the notification template to be sent. Only templates previously recorded in the job are available for selection. For more information, refer to "Notification template" in the iQuote User Guide Objects. |
|
User roles |
Select the user role that will receive the notification.
For example: If the selected user role is “Prepress”, all users linked to this user role will receive the notification. |
|
User |
Specific individual who will receive the notification. |
|
Head office |
Allows the user to select the specific system’s actor (customer, sales rep, supplier etc.) that will receive the notification, even if it is not a user. |
|
Only the user who generates the action |
Indicates the notification will be sent only to the user who set this action. |
|
Dynamic user role |
This field is currently disabled. |
|
Dynamic user |
Select a user who will receive the notification based on their relationship to the object.
For example: The selected option is “Estimator”, If the estimator in the specific job is John, the notification will be sent only for him. |
|
Dynamic customer/ Sales rep/ Provider |
Allows the user to select the system’s actor (agency, client, seller, etc.) that will receive the notification, even if it is not a user.
For example: If the selected option is “Sales rep”, all sales representatives in the system will receive the notification. |
|
Managers only |
It indicates that only users identified on the system as managers will receive this notification. |
Initial user/ User role assignment
Click New. The following window will open.
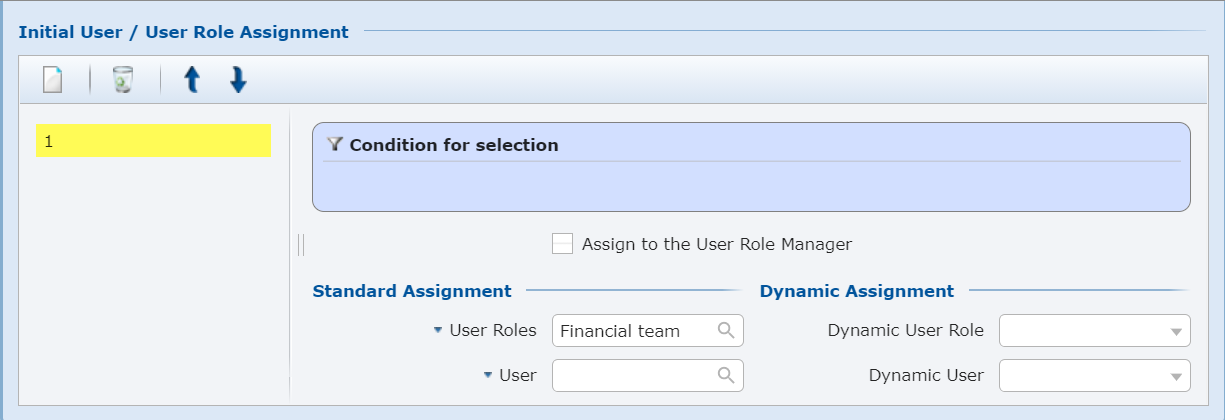
Click Condition for selection to set the filters for selection the user or user role.
Enter the appropriate conditions and click Ok.
Select Assign to the user role Manager for automatically assigning the event to the user role’s manager
Complete the fields in the screen as described below:
|
Area |
Field |
Description |
|
Standard assignment |
User roles |
Select the specific user role responsible for the event. For example: Financial team. |
|
|
User |
Select a specific user responsible for the event. |
|
Dynamic user |
Dynamic user role |
This field is currently disabled. |
|
|
Dynamic user |
Select which system’s user will be responsible for the event based on their relation with the job. For example: The event will be assigned to the user who changed the customer’s status to "client". |
Access control tab
From the list on the left, select the user group to which you want to assign access

Under Access, on the right, select the actions that will be authorized for this user group, as described below:
|
Action |
Description |
|
Edit Event |
Select it to define this user group can edit the event. |
|
Cancel Event |
Select it to define this user group can cancel the event. |
|
Finish Event |
Select it to define this user group can finish the event. |
|
Edit Priority |
Select it to define if a user is allowed or not to make changes in the Priority field, from the Job Event screen (navigate to Planning > Planner > Job Event). |
Repeat steps 1 and 2 for each user group as needed.
Click Save.
Click Save again and then click Apply workflow. This may take a couple minutes.
Job Event browser
The job event browser lists all events linked to jobs.

The browser provides two standard filter options: default and pending items. It also shows relevant information on each event, such as:
Status
Due date
Schedule color
Event
Job
Event type > category
User role
Previous event
Assigned to
Previous event status
Job number
In the task bar the user finds buttons for the following actions:
|
Button |
Description |
|
|
Click the main button for creating a new pre defined event or open the dropdown menu for selecting between: Pre Defined event Non Defined event. For more information, check How to create events. |
|
|
Select a job event and click to edit. |
|
|
Select one or more job events and click Star/ Stop to start job events that are “on hold” or pending or turn events that are “in progress” into “pending” status. Note: When an event is started, the system assigns it to the user that performed the action. |
|
|
Select a job event and click to set it as completed. |
|
|
Select a job event and click to cancel it. |
|
|
Select one or more job events and click “Assign to me” for committing job events to your name. Note: It is possible to define a user role in to the job event. In this case, only users with the selected user role can be assigned to the job event. |
|
|
Select two or more job events and click “Link events” to create relationship them. For more information, check Linking events. |
|
|
Click the drop down menu for exporting the data in this browser as a CSV or a PDF file. |


Inside the job event, the user finds fields with relevant information about the event. Some are read-only, and some are editable fields:

|
Field |
Description |
|
Event type |
Displays the event type name. This field is read-only. |
|
Status |
Shows the current status of the job event. This field is read-only. |
|
Priority |
The priority is originally defined in the event type configuration, but can be edited here. |
|
Event in alert status |
If there are any issues in the event, iQuote puts it in Alert state. This parameter is read-only. For more about alerts go to Event creation types. |
|
Alert text |
When an event is set in alert status the, the system populates this field with information on what are the event issues. This field is read-only. |
|
User role |
Indicates the user role responsible this event. This field is read-only. |
|
Assigned to |
Select or change the user the event is assigned to. |
|
Due date |
Depending on the event type configuration the due date is automatically calculated. Enter or change the values in these fields for defining a fixed due date. |
|
Fixed due date |
Check this parameter for fixing the due date.
NOTE: When the user enters a value in the field “Due date”, this parameters is automatically selected, but it remains editable and can be manually deselected. |
|
On hold |
Check this parameter for changing the event status to “on hold”.
Note: When this parameter is selected a new field opens in this screen. In “On hold reason”, type in the relevant information on why the event has been put on hold. |
Note: The job to which this event belongs is indicated in the header of this screen and it’s also a link:

It allows the user to quickly access the respective job, if needed.
Notes
Click the upper field under the Notes tab to enter useful information about the event. The text entered here is displayed in the event link in the Desktop and in the Job > Engineering > Details > Events.

History
Under the History tab are recorded all changes made to this job event, such as:
Creation;
Status change;
Due date change;
Assignments;
General.

Alerts
If some critical information is incorrect in the job event, the system displays an alert so users know to check and fix it before proceeding. This alert is identified in the Job event browser by the status icon and the “Alert state” parameter checkbox:

Different situations can put an event in a state of alert, according to the event creation type. For more details, go to Event creation types.
Note: Job events in alert state are displayed in red in the desktop’s Events widget:

Click the event to open a popup with more about the event and the alert:

Linking two events
iQuote allows the user to create links between events. When linking events users can set up the time interval between them, this way if the due date of one event changes, the other event’s due date is automatically updated.
|
EXAMPLE |
|
I have created two events and I want to create a link between them: Receive art files. Send proofs for approval. Now, since I must have already received the art files in order to print the proofs I’ll send to the customer, I’ll set “Receive art files” as previous to “Send proofs to customer”:
Also, I don’t know exactly when the customer will send me the art files – this due date may vary. Nevertheless, I need to send the proofs back to the customer at most 10 hours after receiving the art files. So, I’ll set the system to update the due date of the second event for 10h after the first one:
Once the event is linked the status icon shows a link icon in it:
|


|
RESTRICTIONS |
|
You can link several events in a row, with or without defining the time span between them:
But the system does not allow for recursive relations. For example: In the following image the event “Receive art files” is linked to “Send proofs for approval”, that is linked to “Plates pre-check”. Since the last event is already indirectly related to the first event, it is not possible to create a direct link between them:
|
|
A Header type event cannot be preceded by any other event types:
|
|
A Characteristic type event can be preceded only by Header or Characteristic type events.
|
|
A Production group type event can be preceded only by Header or Production group type events.
|
|
A Product version type event can be preceded only by Header or Product version type events.
|


Linking events in the job event browser
In the Job event browser select the appropriate events and click Link events.

Under Previous event select events so to set the order of the linked events.
For each event, define the time span or the due date – as appropriate.
Click Confirm.
Linking events in the object record
Go to Administration > Workflow > Object.
Open the Job object and go to Event type tab.
Click to select the desired events and then click Event type link.

Click New for adding an event type to be linked.
Under Previous event type select events so to set the order of the linked events.
Under Hours define the time span between the selected event and the previous one.
Click Save.
How to manually create events
In the event type configurations, users set up which actions trigger the automatic creation of events.
Note: For a detailed explanation of how to configure the event triggers go to Event types.
But iQuote also provides two options for manually creating events: pre-defined or non-predefined.
Simply clicking New, opens the New pre-defined event window, since this is the default option. But users can also click the side arrow and select the Non-defined Event option instead.

Pre-defined event
Click New pre-defined event.
The system opens a list of all the available events that can be manually created. Only event types “Header” and “Product Versions” are available.

Note: For more on how to make an event available for manual creation go to Event types.
The field Job automatically shows the job respective to the event that was selected in the event browser, if any.
If necessary, type in the appropriate job number or use the look up for searching for another job to filter the events by.
Click the Check/ Uncheck button for selecting or unselecting all pre-defined events at once.

Select as many pre-defined events as appropriate.
Under Notes, click the three dots to enter a note to the event.

Click Confirm. All selected events will be created for the selected job.
Non-defined event
Click New non-defined event.

The field Job automatically shows the job respective to the event that was selected in the event browser, if any.
If necessary, type in the appropriate job number or use the look up for searching for another job to filter the events by.
Fill in the remaining fields as appropriate
|
Field |
Description |
|
Description |
Enter the event name. |
|
Priority |
Select a priority level (average, high or low) for the event. |
|
User role |
Select the user role to be responsible for the event. If this field is selected and the User field is left blank, all users within the selected user role will have access to the event. |
|
User |
Select a specific user responsible for the event. |
|
Due date |
Specify the final due date for completing this event. |
|
Notes |
Enter relevant information as needed. |
Click Confirm.