How To Create a Job
The system gives the user three different ways to create Jobs: automatically from an approved estimate, coping an existing Job or creating a new one based on a product specification.
Bellow you can find the step-by-step for each of these options.
Automatically – Integrated with iQuote
In the system’s main menu, click Administration > General configuration > System > General settings or enter "General settings" in the Quick Search field.
Under Job, check the “iQuote integrated with iPlan” option:
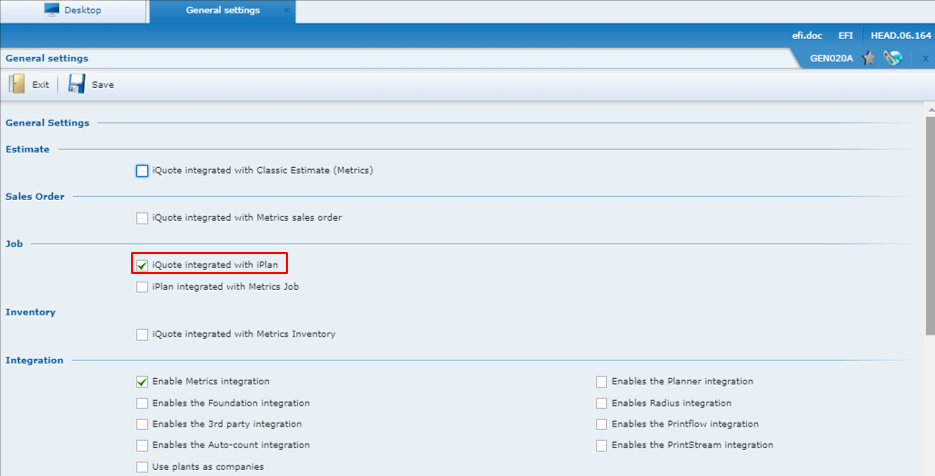
Click Save, then click Exit.
Back to the system’s main menu, click Sales > iQuote > Estimate or enter "Estimate" in the Quick Search field.
Select the appropriate estimate and change its status to an approved one (tag 4 or 7). The following screen will open:

In Quantity option, select the option to be approved.
Click Confirm.
Click Save, then click Exit.
The system will automatically create a new Job linked to that estimate. To access it click Planning > Planner > Job, In the system’s main menu.
The new Job will have the description name identical to the estimate’s:

Copy a Job
Note: Duplicated Jobs cannot be linked to any Estimate.
In the Job browser, select a Job and click Duplicate Job.
The following screen will open:

Under Copied job data, check the Rework option if necessary. It allows you to automatically relate the original Job to the new one,
Edit the information under Copied job data, if necessary.
Under Products, the system displays a line for each Product. You can:
Inform the number of products for this job in the Quantity field.
Define a Delivery Date for each product.
Click the Apply Delivery Date button to apply the same Delivery Date to more than one product that belong to the Job you are duplicating, so that you can make sure that the dates are the same.
Edit the other fields, if necessary.
Enter relevant observations, if any, under Notes.
Click Confirm.
New Job
Note: Jobs created based on Product specifications cannot be linked to any Estimate.
In the Job browser click New Job.
The following screen will open:

Fill the fields in this screen with the product’s information.
Under Components to be added to the Job choose a previously recorded product specification. This PS will provide the basic structure for this Job’s product.
Note: By default the system will make available to select only the specifications of products from the client specified at the top of the screen. To access product specifications linked to other customers enable the Present PS of all customers option.
Note: To select multiple product specifications at once click Select Products.
Fill in the Quantity and Delivery date fields with the appropriate values.
Note: PrintFlow Integration
iQuote sends the child components’ delivery date in the XML message to PrintFlow. The child component inherits the delivery date from the final product that it is related to, even if there are other components between them. In the case of child components linked to more than one final product, the component’s delivery date will be the latest date between the dates of the final products.
Click Confirm.
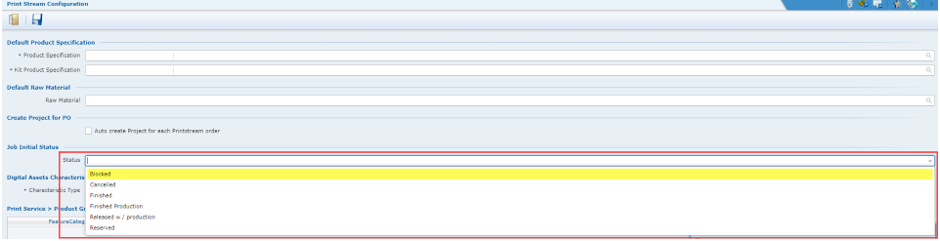
PrintStream Integration
If your iQuote system is integrated with PrintStream, you can create a Job record in iQuote by sending a BOD message from PrintStream to iQuote.
By default, the system creates this new Job record with the initial status that you defined in your Job workflow. However, you can also navigate to Sales > Records > iQuote > Integration > Print Stream configuration and select a specific status on the Status field so that iQuote applies this status to any new Job record that you create through PrintStream.